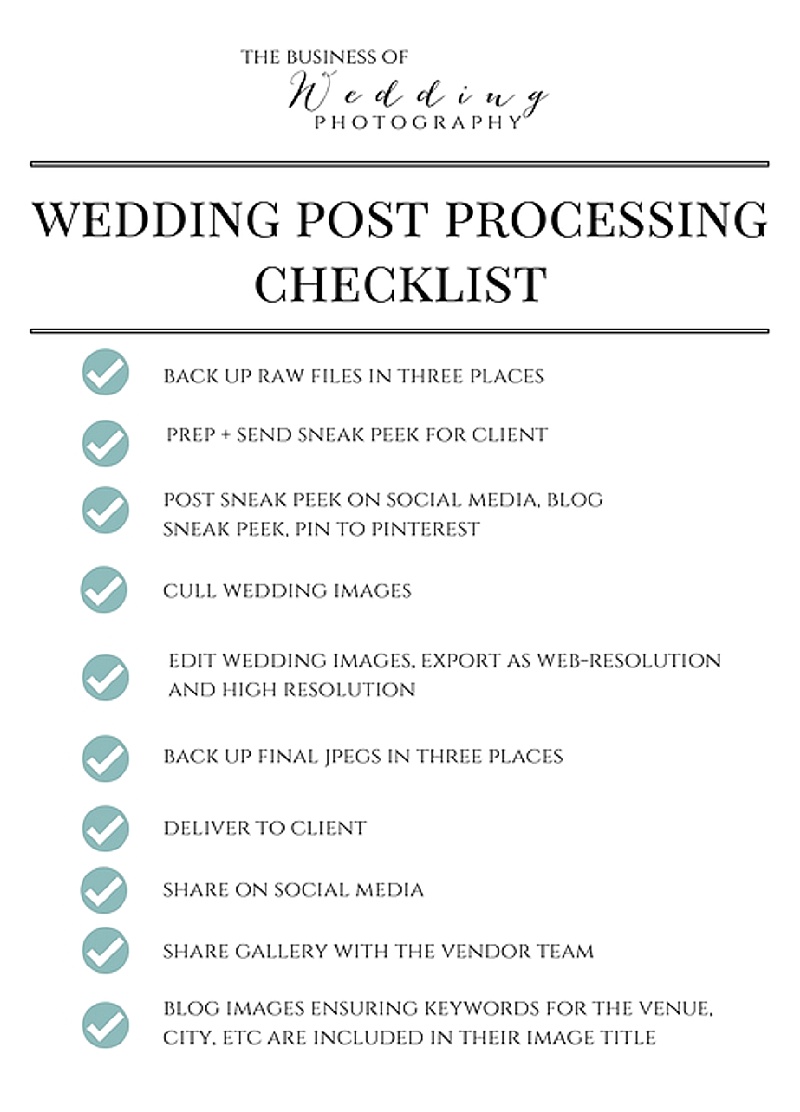
As a wedding photographer, the majority of the workload comes AFTER the wedding itself has occurred. From backing up the images to editing to sharing them on social media and your blog, there is a LOT to do here!
In order to make sure each step is accounted for and nothing is skipped, I have created a step-by-step guide to help get you through the many things that should be done during post processing. You can find + download it in the FREE RESOURCES LIBRARY

To give a little more detail and insight into my own process for handling wedding photos, I have also elaborated on this below. It is SO important to ensure that your photos are properly backed up so please ALWAYS take extra care with this. In addition to your own backup, I also recommend that you send along a ‘how to back up your images’ info card in your wedding client’s final package.

(Please note that the following post contains a few affiliate links from companies that I LOVE and use in my own workflow!)
The Night of the Wedding:
No matter how late your weddings ends, how long my drive home is, or how busy I am the next day I always back images up immediately upon returning home or to my hotel. From my memory cards I back the files up in triplicate- once on an external hard drive, a second time on my desktop hard drive, and a third time on another computer.
Within a Few Days of the Wedding:
I prepare a preview to post online for my clients via my Facebook page. This usually consists of about 5-7 photos. Clients are also informed right before this is posted so they know to expect it, and are informed of the 4-6 week estimation of when the full gallery will be ready.
Culling:
I use Photo Mechanic to cull my images. Prior to discovering this program I did all my culling/sorting in Lightroom, until I discovered that Photo Mechanic is a fantastic program for this- it loads the images at lightning speed and exports full resolution copies of the RAWs at the fastest rate I have ever seen. I keep all images which tell the story of the day in a flattering way and are not exact duplicates. For a typical 8-10 hour wedding, this usually results in 700-900 images.
Editing:
I edit 99% in Adobe Lightroom, and occasionally have a few images I need to edit down to the pixel in Photoshop. I am at the point where I now have an in-house editor who does all of my editing for me. I send her the sneak peek which I edited as a guideline for her to use, and then she edits all of the photos for me using a Lightroom Catalog with Smart Previews so file transfer doesn’t take forever. Once editing is done, the files are exported. Images are then formatted for Facebook, blogging (I use this program for blogging and embedding SEO keywords for pinterest/blog), and client galleries.
Backing Up:
Once images are exported, they are kept on an external hard drive. Additionally, I back up all of my high resolution images on a cloud storage. I use Crashplan . The photographer community seems to love Backblaze, and I did too-until I found out that Backblaze only acts as a mirror of your current system. Once a drive or folder has been removed from your system for more than 30 days, it deletes the backup. Basically, you have to plug in each external hard drive once a month in order to retain your backups…which basically defeats the point of having a backup in the first place. Finally, I burn a dvd copy of the high res images as well as a third form of backup. Anal retentive much?
Delivering Images to Clients:
Clients receive images in a highlight slideshow (click to see how I create this), an online proofing gallery, and a custom usb package with some gift prints + a little extra love. I use now use PASS– previously I used by Into The Darkroom since I preferred to have my own private system loaded onto my website as opposed to paying monthly or by the gallery for a service. However, PASS offers the ability for clients and families to download the full gallery with one single click and it is much more convenient for them to share photos this way.
The Client’s Job:
ALWAYS eject the USB properly. Never just pull it out of the drive without first closing the folder and hitting “eject” from your computer. Doing this will eventually result in killing the drive. Always- it’s just a matter of time.
As a wedding client or portrait client, they absolutely must make sure to back up your photos in at least two place, preferably three. Clients may lose the usb, unplug it improperly and fry the FAT pathways rendering it useless, lose files in a move, have their laptop stolen, etc. It is part of your job to remind them to back these up by creating a second and third copy on a hard drive, external hard drive, cloud storage, disk, or other form of storage and try to have one copy offsite or in the cloud in case of fire/theft. I enclose a ‘How to Backup Your Images’ card in all of my USBs.
Send Gallery To Client + Vendors:
I always send the gallery to the clients and then send out the gallery to vendors a few days later. I send high resolution NON-watermarked images to the vendors with instructions on how to credit back to me and any usage restrictions. Sending to vendors is a huge FREE MARKETING technique that gets your images shared, re-pinned, and linked back more frequently. You also form stronger networking connections if you are a pleasure to work with and help out the vendor team!
Share on Social Media, Blog, Pin:
Don’t forget to let your wedding photos and the hard work you did to create them get all of their marketing mileage for you. Share, blog using BLOGSTOMP, and pin images that represent your brand well and make sure you title them with keywords that your target client may be searching for as they are wedding planning.
Can you remember that all? No? Good thing there’s a
waiting for you over in the free resources library!


No Comments